Why Your Neapolitan Pizza Crust Never Gets Leopard Spots in a Home Oven (And How to Fix It)

Are you trying to make an authentic Neapolitan pizza crust in your home oven but struggling to get those classic leopard spots?
I have tried so many things over the years, and it took me a long time to understand what was actually holding me back.
At first, I thought the main culprit was the dough, but it wasn’t really. After baking countless pizzas, I realized that the recipe isn’t really the issue here.
There are many factors that affect the development of these small, charred blisters, including temperature of the oven, baking time, fermentation, hydration, and even the baking surface itself.
You might have noticed that many outdoor ovens can cook a Neapolitan pizza in just 60–90 seconds, thanks to their ability to reach high heat. But our regular home oven can’t generate that intense heat, so without the high heat, the crust dries out and browns evenly before it has enough time to form the leopard spotting.
But don’t worry, it is not impossible. In this guide, I will explain why homemade pizzas struggle to form leopard spotting in a home oven and what actually helps to create those classic pizzeria-style spots.
What are the Leopard Spots on a Neapolitan Pizza Crust?

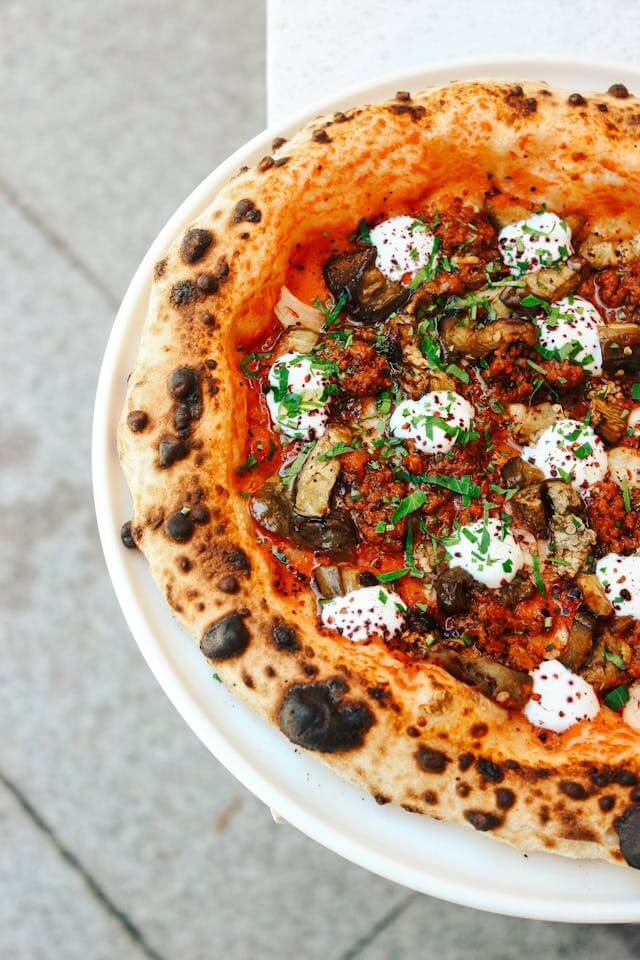
Leopard spots are the small charred marks that usually form on the outer crust (cornicione) of a traditional Neapolitan-style pizza. Now, these black, charred spots form when parts of the dough quickly puff up and blister under very high heat.
But don’t think that a proper leopard spotting is like a fully burnt crust with an awful bitter taste. It tastes like a light, wood-fired, smoky flavor and a bit of bitterness, but in a pleasant way.
Why Home Ovens Struggle to Create Leopard Spotting?
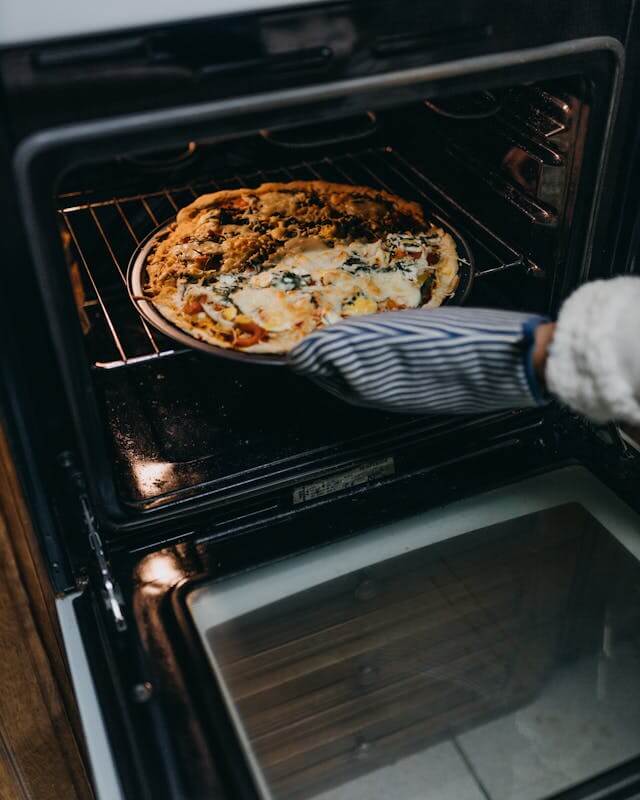
One of the biggest downsides of the home ovens we use is that they cannot generate the intense heat that outdoor pizza ovens can.
A true wood-fired pizza oven can easily reach 800–900°F, while home ovens can hardly get to 450–550°F. So, can you see the difference, almost half?
Wood-fired ovens produce very strong radiant top heat, which helps form rapid blistering on the crust before the dough has time to dry out. And in a home oven, the top heat is usually very weak and not very direct, so the crust browns very slowly and fails to develop those small charred spots.
Because of this temperature difference, it will affect the baking speed, correct? A traditional Neapolitan pizza bakes in 2 minutes or less in an outdoor oven. In a regular home oven, it can take much longer. And due to this longer baking period, the dough loses moisture, drying out the crust before the small blisters can fully develop.
That is why even if you get the perfect dough, you will still struggle to get the same leopard spotting as you get in a pizza oven.
Why High Temperature is crucial to Create Leopard Spotting?
A proper leopard spot forms when your pizza bakes very quickly in a short time at very high temperatures.
Now, when the pizza dough hits the hot baking surface, the crust puffs up quickly and starts to form small blisters. This rapid expansion, called fast oven spring, helps create leopard spotting.
As the dough heats up, the moisture instantly turns to steam, causing some parts of the crust to rise and char faster than others. And because of the extreme heat, those spots burn, making it almost impossible for the rest of the crust to brown fully.
Another reason is the short baking time. The actual baking time of a classic Neapolitan pizza is only 60–90 seconds, so this brief period is enough for the crust to blister and char without drying out the whole crust.
How Dough Hydration Affects Leopard Spotting?
A pizza dough’s hydration is the ratio of water to flour. For instance, if you use 100g of flour and 60g of water, the hydration will be 60%. That’s it.
So, how much hydration do you need to achieve a perfect char in your pizza? Well, more moisture means more steam, and more steam can help you to get those blisters, but it doesn’t mean you should add more water.
When you place your pizza on the oven surface, that moisture turns into steam almost instantly, helping the crust puff up and creating small blisters.
A High hydration doesn’t always mean better leopard spotting, especially if you are using a regular home oven. A home oven generally bakes much more slowly than a traditional pizza oven, so if you use too much wet dough, the dough will hold too much moisture and not bake fast enough, leaving you with a soft, pale crust instead of charred spots.
A classic Neapolitan pizza needs around 55–65% hydration, and this range usually gives the best results. However, if you are planning to try different pizza styles, the hydration will differ, too. A New York-style pizza needs 58–65% hydration for a chewy crust, while for Sicilian or Detroit-style pizza, you will need much higher hydration, like 70–80%. Still, they will be softer and have a thicker crumb rather than perfect leopard spotting.
So you see, balance is everything. Don’t think that the more the better. A well-balanced level of hydration can help the crust blister and puff up properly. Still, too much hydration in a home oven can actually reduce the chances of getting a well-defined leopard spotting.
Why Fermentation Helps Create Better Leopard Spotting?
Fermentation is another important factor behind a puffy crust and better leopard spotting. As the dough ferments, the yeast produces gas, creating small air bubbles throughout the dough.
These little air bubbles matter a lot when the pizza goes into the oven. It helps the crust puff up faster, and when it does, small blisters form easily, giving your pizza that leopard look.
Proper fermentation also helps make the dough light and airy. If the pizza dough is well rested, it will be even softer, which helps the crust develop nicely in the oven.
Another benefit is the sugar development. If the dough ferments for a longer period, natural sugars build up, helping the pizza crust brown and char more easily, which naturally creates that dark, blistered pattern.
So that is why most home bakers cold ferment their dough for 24 to 72 hours, to improve overall structure, flavor, and blistering. But try not to get beyond that window. If the dough ferments for too long, then the yeast will eat up all the sugar, and your dough will become weak and flat.
However, cold fermentation alone won’t get you there. Even if you make the perfect fermented dough in the world, if your oven is not hot enough, it will not develop the charred spotting you are looking for.
Why Baking Steel Usually Creates Better Leopard Spotting Than Thin Stones?
The baking surface you are using matters, too, and in most cases, a baking steel will help you achieve better leopard spotting than a thin pizza stone.
The main reason is the heat transfer to the dough. A baking steel transfers heat to the dough much faster. As soon as you place your pizza dough on the baking surface, the bottom of the pizza starts baking right away. That quick burst of heat helps the crust to puff up fast and naturally forms those nice little blisters.
I won’t say that a thin pizza stone can’t make a great pizza. It can, but thin pizza stones heat up really slowly and even lose the heat between bakes. So the crust may bake unevenly and struggle to develop the strong blistering and charring you are looking for.
Another benefit of using a baking steel is the recovery time. A baking steel stores a lot of heat and transfers it efficiently.
For instance, when you bake your first pizza at around 550°F, the dough immediately extracts that heat from the surface, and the temperature drops in an instant, right? And if you are using a thin stone, the time for that heat to recover might take too long, and if you try to put another pizza in, then your crust will bake slowly, and the blistering will get weaker too.
But in the case of a baking stone, as soon as you take out the first pizza, the baking surface gets back to its original temperature very quickly, and you can bake another pizza almost right away. Now it is really helpful if you are hosting a family gathering or having a great time with your friends on weekends.
However, that doesn’t mean that a pizza stone can’t produce a proper leopard spotting. A thick pizza stone also retains heat well. But if you want a stronger crust in a home oven, I would say baking steel is the best bet.
Why Preheating the oven Longer Matters More Than You Think?
Don’t assume your oven is hot enough to bake right away when the preheat light turns off. The air inside the oven may have reached your desired temperature. However, your baking surface, whether you are using a baking stone or steel, still needs more time to heat up completely.
And if your baking surface is not hot enough and you let your pizza in, it cannot give the dough that strong burst of heat it needs. So eventually, the crust will rise more slowly, and you will end up with weak blistering or not at all.
That is why most experienced home bakers recommend preheating your oven for around 45 to 60 minutes, even after the oven indicator says it is ready. Now that extra time will let your pizza stone or steel absorb and store as much heat as possible.
Once it’s fully heated, the moment your pizza touches the hot baking surface, it will get an instant, stronger burst of heat at the bottom. And that is exactly what you will need to get the crust to puff up faster and develop that leopard spotting you are going for.
Does Home Oven Rack Position Affect Leopard Spotting?
The answer is yes, it does. But rack position doesn’t simply mean that a higher or lower placement will give you better charred-spotting results. It is about maintaining the balance of the heat.
For instance, if you place your pizza on the lowest rack, the bottom will bake just fine, but the top of the crust won’t get enough heat. So without the top heat, you will be more likely to get an evenly browned crust rather than those dark blistered spots you desire.
On the other hand, if the pizza stays too close to the top, like in the upper rack position, the bottom crust might not have enough time to bake properly.
As for me, I find the upper-middle rack to be the best sweet spot. It often works well for me because when I place the pizza closer to the oven’s top heat, it still allows the bottom crust to cook on a properly preheated baking steel or stone.
Another trick I often use is the broiler method. I switch it on and let that extra heat hit the top of my crust during my last 30 to 90 seconds of my baking time. Well, it helps me push the blistering and charring a little further, which lets me get closer to that leopard-spotted look.
At the end of the day, the goal is not to place your pizza in the higher rack of the oven. A proper leopard spotting forms well when the crust gets strong heat from both directions at the same time.
However, keep in mind that not all ovens are the same. They act differently, so it is better to understand your oven and experiment with rack positioning to see which works best for you.
How do you understand the difference between Leopard Spotting and Burnt Pizza Crust?
Many people assume that good leopard spotting and burned spots are the same thing. But actually they are not.
Leopard spotting refers to those small dark spots scattered across the crust. These small dark spots form when tiny blisters char under high temperatures, and the rest of the crust stays golden brown.
On the other hand, a burnt crust is a completely different story. You will notice that, instead of small dark spots, large areas of the crust look completely black, and they taste very bitter. Now this can totally ruin the overall flavor of the pizza.
So the aim is not to make the whole crust black when getting a proper leopard spotting.
Let me explain how to tell the difference. If you see that most of your crust looks golden brown with a few dark blisters here and there, then that’s the leopard spot. But if you see that the larger portions of your crust go fully black and taste very much bitter, then there is nothing to do, you just burnt your pizza.
How to Get Better Leopard Spotting in a Home Oven?
I know it is a little difficult to bake a pizza with perfect leopard spotting in a home oven, as you can get from a traditional pizza oven. But there are several things you can still try to improve your chances of getting better leopard spotting:
- Preheat longer than you think you need to: Give your baking steel or pizza stone at least 45–60 minutes to heat up fully.
- Use the highest oven temperature available: Leopard spotting forms more easily when the pizza bakes quickly.
- Use a baking steel if possible: Steel transfers heat much faster than a thin pizza stone, which can improve blister formation.
- Use the broiler carefully: Extra top heat can help create more blistering and char on the crust, but not more than 30–60 seconds. Anything beyond that can burn the toppings and cheese.
- Use a well-fermented dough: Proper fermentation helps create gas bubbles and improves crust development.
- Don’t overload pizza toppings: Heavy toppings can slow down baking and reduce blistering.
So Can You Truly Replicate Wood-Fired Leopard Spotting in a Home Oven?
Honestly, you can get close. Still, it is really very difficult to duplicate leopard spotting exactly as a pizza oven produces it.
A wood-fired pizza oven is designed specifically for making pizzas, right? So it is something that a regular home oven cannot match. A wood-fired pizza oven can easily reach 800–900°F and bake in just a minute or two. And because of this intense heat, it can create the blistering, charred texture that every pizza enthusiast loves.
But many home bakers still get impressive Neapolitan leopard-spotting results by using a pizza steel or a thick stone, preheating properly, and preparing the dough correctly.