Ooni Karu 12 Multi-Fuel Pizza Oven Review
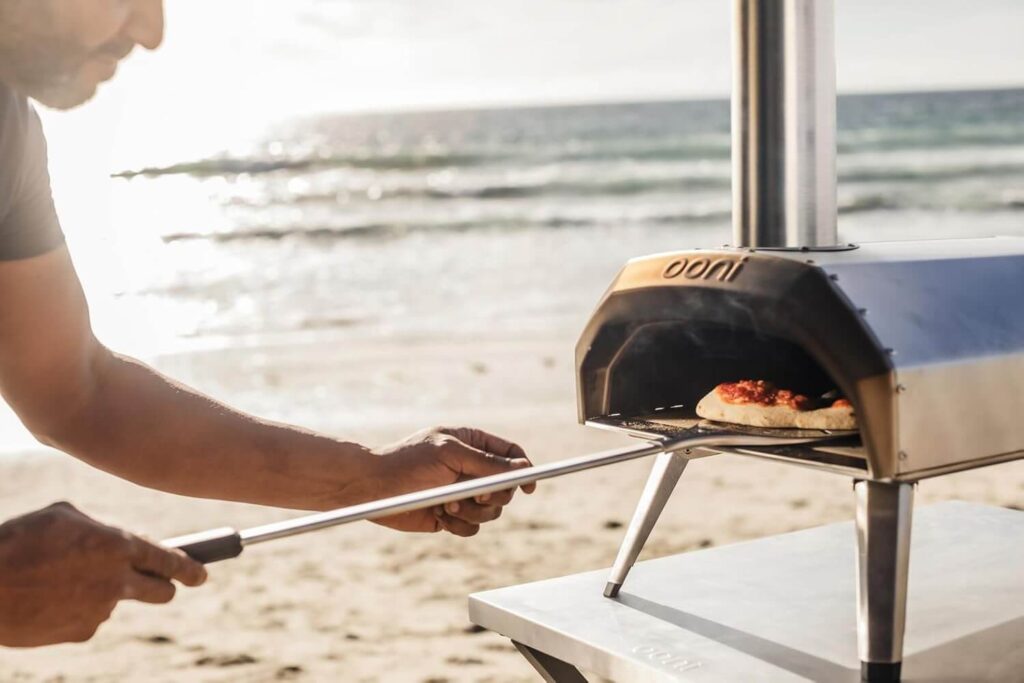
The Ooni Karu 12 is a multi-fueled and versatile pizza oven that lets you cook with wood, lump charcoal, or a gas burner to get a restaurant-style pizza in just a matter of minutes.
I have been using the Karu 12 for over a year now, and I am genuinely impressed by its excellent quality. And still, after using this oven for so long, its performance remains the same as if it were brand new.
What I really liked about this oven is that not only can I use it for my outdoor family gatherings and pizza party, but I can also take it with me on camping trips.
Actually, this Karu 12 is compact in size and weighs approximately 12 kg, making it a highly portable pizza oven for me to carry around.
So in this Ooni Karu 12 Pizza Oven Review, I will share my whole experience from unboxing to cooking performances after using it for more than a year now. Let’s do this right away.
Related: Best wood-fired pizza ovens

Best Budget-Friendly Option
Key Specifications
|
Material & Build |
Stainless steel body, aluminum nose, borosilicate glass visor, cordierite stone cooking surface |
|
Fuel Type |
Multi-fuel – wood, charcoal, gas (burner sold separately) |
|
Cooking Surface Size |
12–inch pizzas, 0.6″ thick stone |
|
Max Temperature |
950°F (500°C) |
|
Weight |
26.5 lbs |
|
Heating Speed |
Ready to cook in 15 min |
|
Portability |
Ultra-portable with foldable legs |
|
Insulation |
Stainless steel shell retains heat efficiently |
|
Cooking Capacity |
1 pizza up to 12 inches at a time |
|
Pros
|
Cons
|
|---|---|
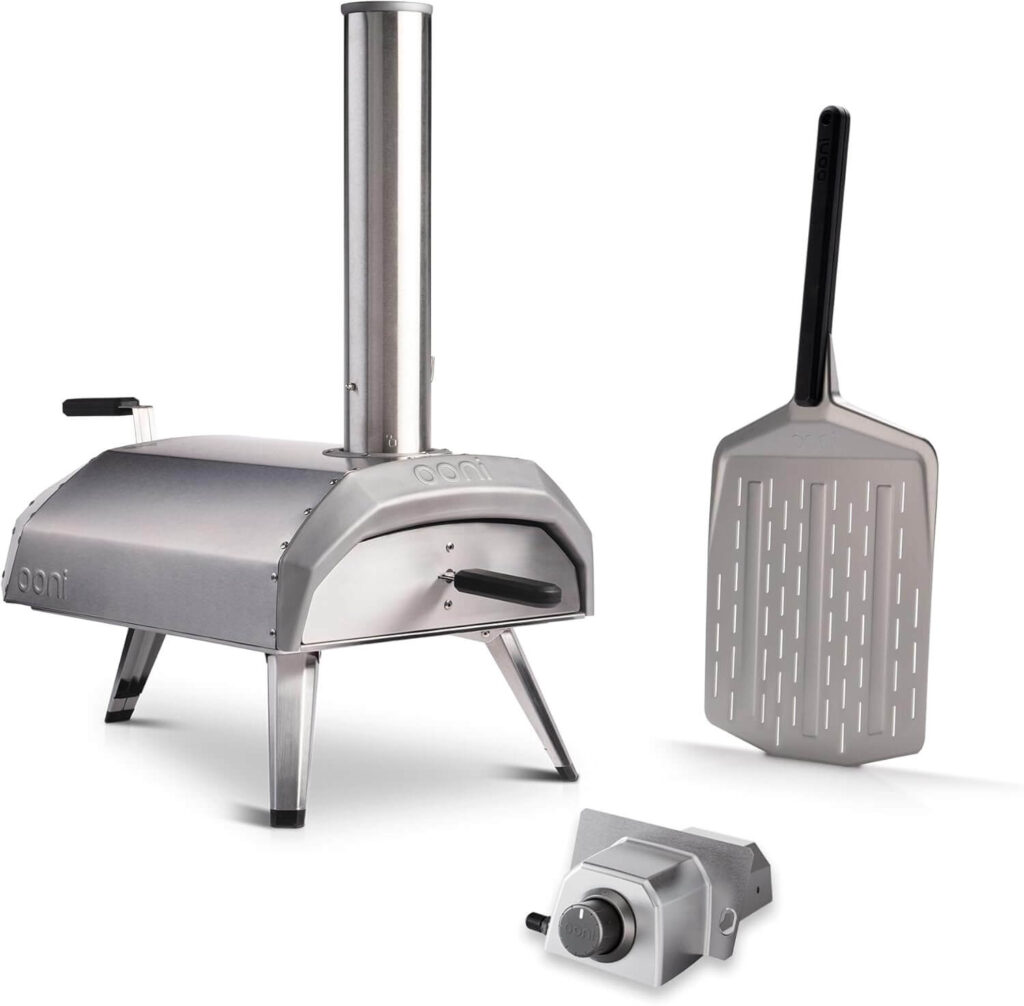
Unboxing and Setup
Setting up the Ooni Karu is relatively easy. Not much hassle at all. When I received the oven,
I found that the main body was already assembled. Still, the chimney, chimney cap, back cover, front cover, pizza stone, fuel tray, and glass door were packed separately inside the box.
There was also an Allen wrench (Hex Key) included in my box because I purchased the gas burner separately. One important thing to note is that if you are planning to use just wood or charcoal, then there is no need for you to buy the Allen wrench.
Now it is time to assemble everything. I started with the legs, but I noticed that it was already attached to the body of the oven. So I just needed to unfold them, and the pizza oven was standing solid and steady. Then I slid the firebox (also known as the fuel tray) into the back of the pizza oven.
Next up, I slid the pizza stone carefully to its place inside the oven so that it fits perfectly. Then, I attached the chimney using a simple twist-lock system. It was extremely easy, and I didn’t even need any screws or other tools.
Finally, after attaching the chimney, I placed the chimney cap and the back cover in their place so that I could get control over the airflow inside the oven.
It’s done, and the whole setup took me just under 5 minutes.
Heating Performance
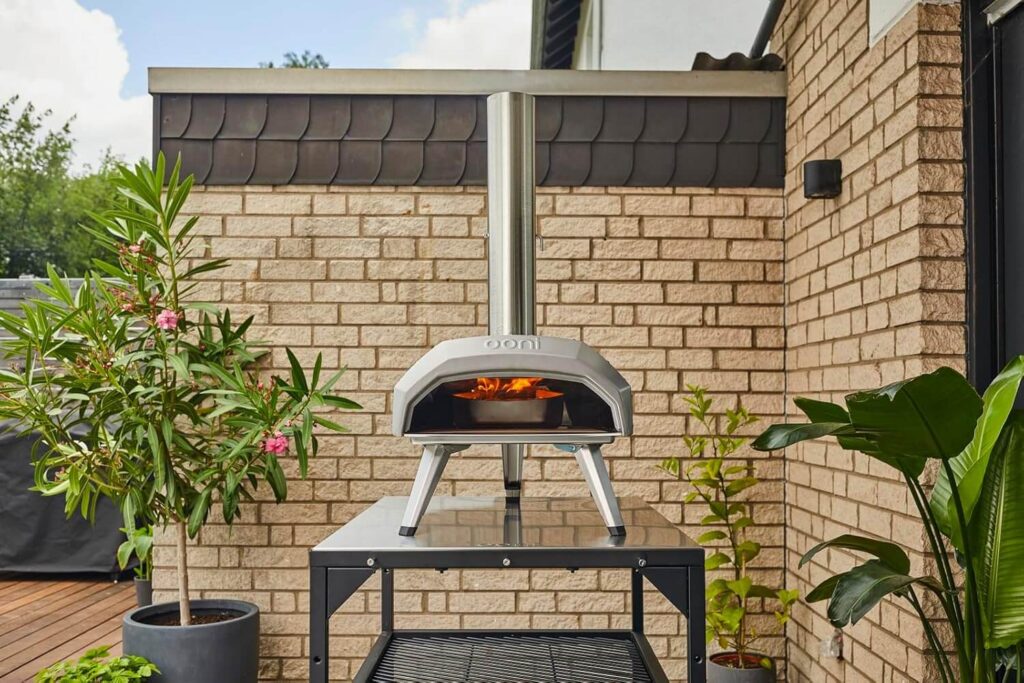
The pizza stone of the Ooni Karu 12 heats up quickly, taking around 45 minutes to reach a cooking temperature of 450–500°C (840–930°F). This high heat allows me to cook a perfect Neapolitan pizza in no time.
But I noticed that after I bake the first pizza, the stone tends to lose the heat very quickly. Later, I realised that the pizza stone is just about 1 cm thick, which is too thin. That is why the oven heats up quickly compared to others and also cools down faster.
I used only wood for the first time when I tried to bake pizzas to achieve the wood-fired feel, but I had a tough time maintaining the high temperature. I had to use dense woods like the maple and hickory, as they worked the best for me.
However, if you are using normal woods, heat will dissipate faster, and you will need to add more logs to it constantly. So you will need a lot of patience if you are only cooking with wood.
However, I wanted to use wood to get my pizza that wood-fired flavor, but with less hassle. I tried mixing the charcoal with wood, and it worked stably for me. The charcoal helped me keep the heat steady, and I added wood on top of it for the flames and flavor. Still,
I had to give more attention to the temperature, but it was a lot easier for me than just using wood.
So later, I tried testing the gas burner, and it made a huge difference.
The oven heated up faster, and I got that consistent temperature like the way I wanted. I no longer had to worry about the drop in stone temperature or managing the fire, and could bake more pizzas in a short time. Gas is a more reliable option if you are cooking for a group of people.
Cooking Performance
I tested by trying to cook the Neapolitan and New York styles with the Karu 12, and the result has impressed me a lot. Let me show you exactly how I did it.
Neapolitan Pizza test
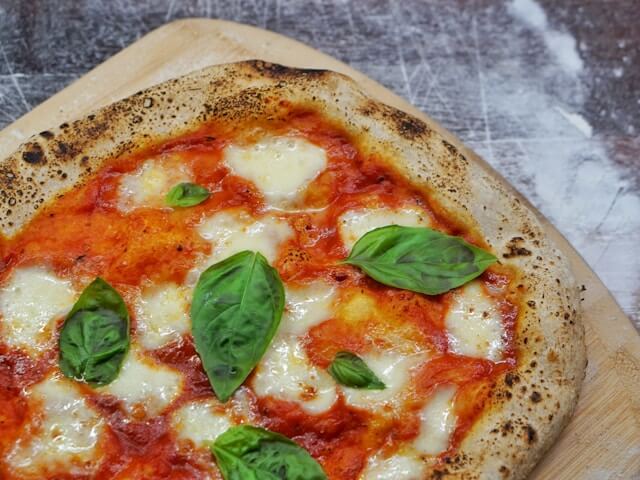
I started by testing with a Neapolitan Margherita pizza. As I mentioned earlier, it doesn’t take much time to get the oven temperature ready to reach 850–900°F (455–480°C). To cook this style of pizza, I used both lump charcoal and wood.
I prepared my pizza dough earlier and stored it in the fridge for some time. Now I took it out and warmed it for a while. Then I rolled the dough with a bit of semolina so that it wouldn’t stick to the board and peel. Then I stretched the dough and shaped it into a 12-inch pizza.
As for the toppings, I gave the dough a bit of tomato sauce, which I made from crushed tomatoes with a pinch of salt. I kept the layer light as I didn’t want the base of the dough to get soggy in the oven.
Then, for the extra flavor, I added a small bit of dry mozzarella with grated Grana Padano. After that, I placed a few Basil leaves under the cheese to get that aroma.
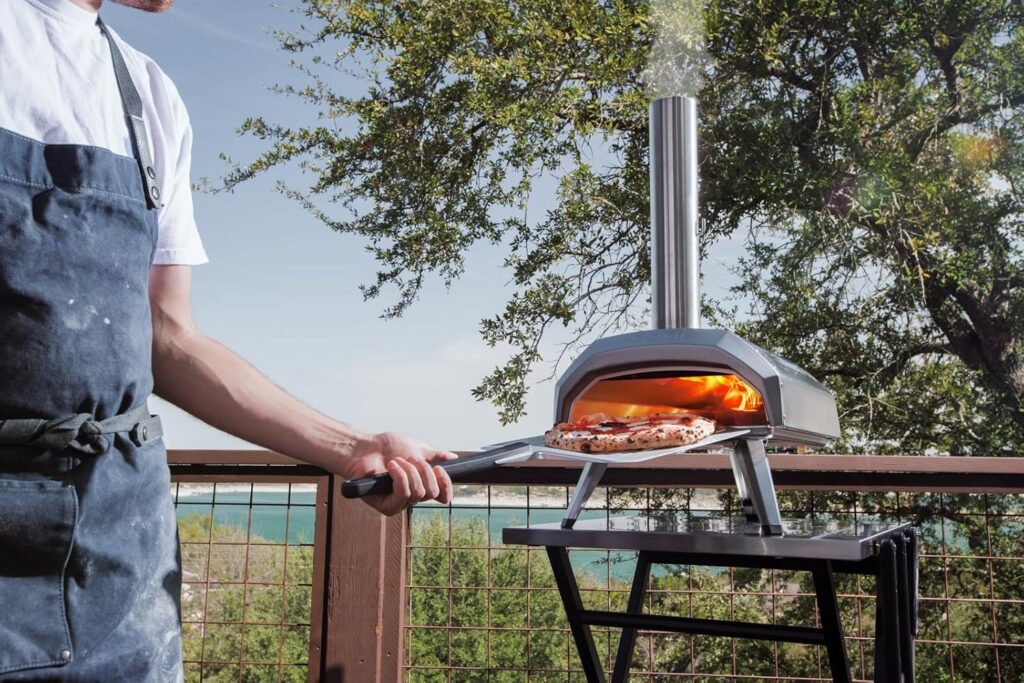
Now that I am done with the toppings, I slid the pizza onto the baking stone and closed the oven door. Then I rotated the pizza with the pizza peel every 10 to 15 seconds, and I also kept a close watch on it so that it wouldn’t get burned.
After 3 to 4 turns, the pizza was cooked at last and just within 60 seconds. The cheese melted nicely, and the crust came with those classic charred spots like an authentic wood-fired flavor in a true Neapolitan pizza.
New York Pizza test
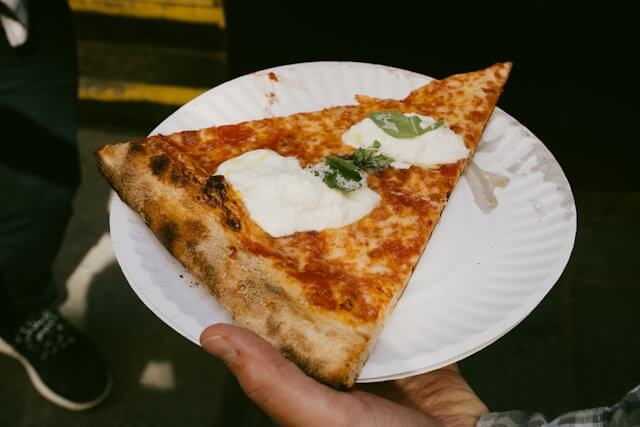
As for the New York Pizza, I already preheated the oven until the stone reached 550–600°F (260–315°C), and it took me 25 – 30 minutes to do so. I used an infrared thermometer to ensure that I achieved the exact desired temperature I wanted.
Now, in case of the pizza, I made a 12-inch one because the Ooni Karu 12 is designed to fit pizzas up to 12 inches, not more. After the pizza was done, I started adding the toppings.
I tested the oven to make a simple classic-style New York pizza. So I gave the pizza a thin layer of crushed tomatoes with a bit of salt. I also added a bit of sugar to it, so that the sauce tastes smoother and more balanced.
On top of that, I added shredded low-moisture mozzarella and basil as the second topping layer. After that, I needed to get the pizza ready for the oven, so I dusted the pizza peel with semolina flour to ensure that it wouldn’t get sticky and slide off easily.
Then, I placed the pizza onto the stone and baked it for 5 – 6 minutes. During this time, I monitored the pizza very closely and kept an eye on the bottom to see that it cooked perfectly. I even rotated the pizza very carefully until the crust got browned all around.
After cooking the pizza, I pulled it out of the oven. And voila, I got that golden crust, the cheese melted perfectly, and the bottom was crispy, just the way I wanted.
Other foods I cooked with the Ooni Karu 12
Besides cooking pizzas, I also tried cooking other dishes with the Ooni Karu 12, such as roasting chicken legs, vegetables, and flatbreads. Let me show you how I did it.
Chicken Legs
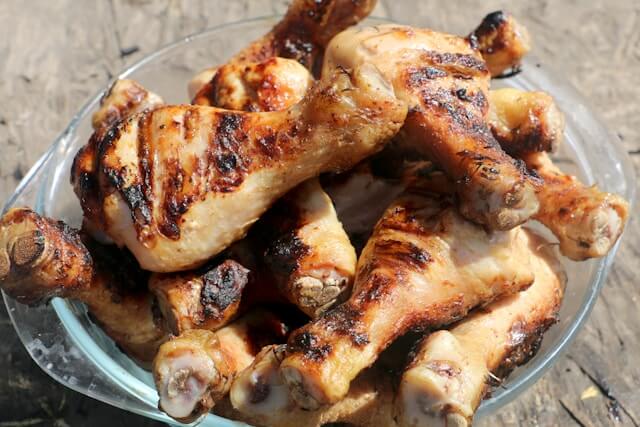
I kicked things off by roasting the chicken legs first. Let me tell you, I used Gas to roast the chicken rather than using wood because I wanted it simpler and easier to use. I could have used woods, but it is tricky to manage the heat.
So I dried the chicken legs with paper towels to get the skin crispy and rubbed them with a bit of salt, oil, and some paprika for the extra flavor.
I already preheated the oven to around 425–450°F (220–230°C), and it took me around 15 minutes to do so. I used a cast iron pan and placed it inside for about a minute or two to get it hot.
Now that the setup is done, I put the chicken in and cooked it for 2-3 minutes, making sure it got a nice golden color on the skin. After searing, I flipped them slowly and cooked the meat for another 20–25 minutes. To make sure the inside of the meat has been thoroughly cooked, I used a Digital thermometer to check that the temperature reaches 165°F (74°C).
The results were terrific. The chicken legs were juicy with that crispy skin and cooked just perfectly. Then I let it rest for around 15 – 20 minutes before serving.
Roasted Vegetables
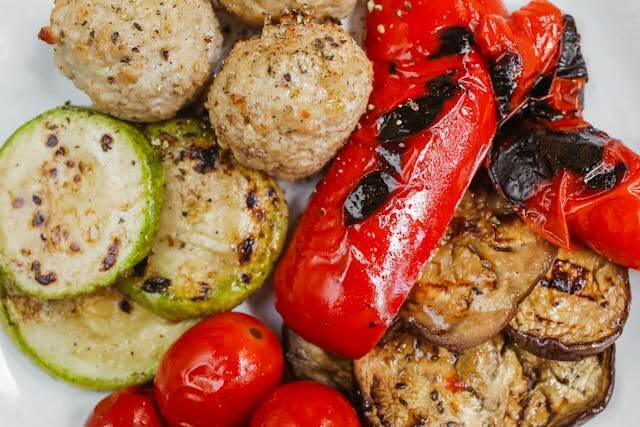
Next up, as for the roasted vegetables, I used zucchini, red ball peppers, eggplant, and tomatoes, and cut them into small chunks. Then I mixed them up with olive oil, salt and some herbs.
I decided to go with the wood to cook the veggies because I wanted that smoky wood-fired flavor, as cooking with Gas will not give me that rich flavor.
Then I lit the wood fire for around 20 – 25 minutes, which helped the oven to reach 400 – 425°F (205 – 220°C). After the pan is hot enough, I spread the veggies evenly in the pan. I roasted them for 15 – 20 minutes, stirring them accordingly.
After the roasting was done, I pulled them out and saw that the edges were perfectly browned, and the potatoes were soft with that wood-fired flavor, like the way I wanted them to be.
Flatbreads
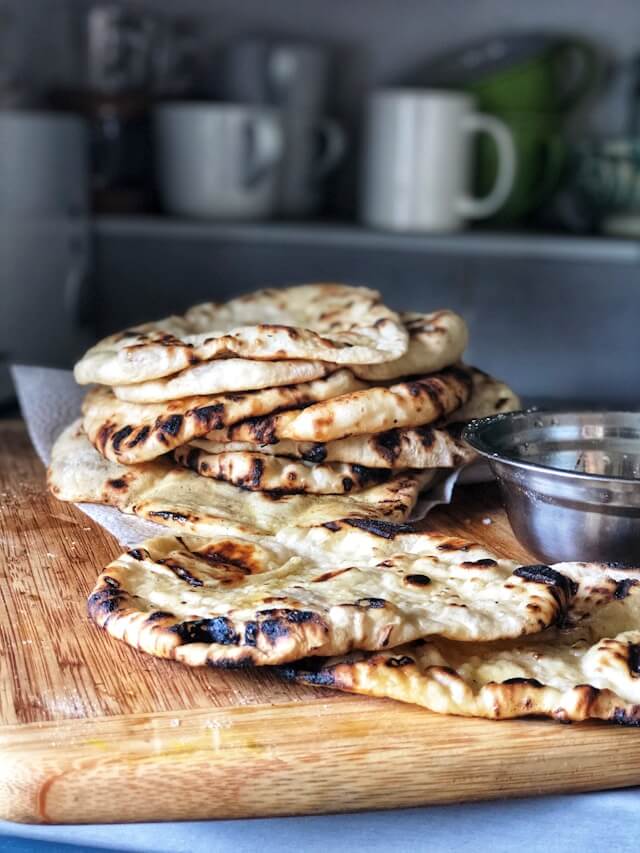
Lastly, I tried out the flatbreads. So I started preparing the dough with two cups of flour, a bit of salt and baking powder, 4 tbsp of yogurt, and 2 tbsp of oil. I mixed them and kneaded the dough for around 3–4 minutes, until it felt smooth and soft.
Then I flattened the dough with the rolling pin into lovely, round flatbreads. After that, I let the dough rest for a while.
I lit the gas burner for 15-20 minutes so that the oven reaches 500–550°F (260–290°C). And once the oven is ready, I cooked each flatbread on the pan for around 2 minutes and made sure that each side of the flatbreads gets soft, puffed up with brown spots.
I cooked four flatbreads, but I accidentally burned the first one a bit. I noticed that the flatbreads cook very quickly, so I had to observe them. A few extra seconds can ruin your cooking and cause it to burn.
How to clean the Ooni Karu 12?
I have been using the Ooni Karu 12 for years now, and I have never had any problems with cleaning it. Cleaning the Karu 12 is straightforward and easygoing. Let me give you some tips and tricks to make your work easier.
Let the oven cool down, and protect yourself.
Always wait for the oven to cool down completely before cleaning to avoid unnecessary burns or injury. So it is better to wear heat-resistant gloves not only to protect from burns but also from sharp edges.
Cleaning the Interior
You might see a few scratches on the stainless steel finish, but that is entirely normal with regular use. Of course, the interior won’t look brand new if you’ve been using it for a while. So minor soots and discoloration are common when you are cooking with fire.
Remove food remnants safely
After cooking, let it cool down and use a dry, clean cloth to brush off the leftover flour or crumbs. Just remember not to use any water inside the oven, as it will damage the baking stone.
Burn off excess food
To make things much easier to clean, run the oven at high temperature for about 35 minutes. It will burn off all the leftover flour and food residues.
Cleaning the cooking stone
To clean the cooking stone of the Ooni Karu 12, I usually use a dry oven brush or spatula to remove all the ashes or small burnt leftovers. And the stone is double-sided, so flip the stone and clean the opposite side, then place it back in the oven. This way, I make sure that both sides are adequately cleaned.
Clean the chimney periodically
Soot can accumulate over time, so always use a long-handled brush to remove the debris, but ensure that you do not damage the chimney baffle.
Maintain airflow
After some usage, the fuel tray can get some rust, and this is quite normal and doesn’t affect the performance of the oven. But regularly brush off the ashes to maintain proper airflow and oven efficiency.
Clean the Exterior
To keep the exterior clean, use a slightly damp and soft cloth to remove dust from the oven. For stainless steel areas, use a non-abrasive cleaner.
Routine frequency
To keep your oven working efficiently, it’s essential to perform a quick brushing and wipe out any leftover debris after each use.
Is the Ooni Karu 12 Multi-Fuel Pizza Oven worth it?
Absolutely, the Karu 12 is definitely worth it if you are looking for an affordable and quality outdoor kitchen pizza oven. After spending some time cooking with it, yes. It definitely gives you an authentic wood-fired pizza flavor, but it requires a lot of wood, and you need to feed the fire constantly.
The best way is to use both charcoal and wood, but it is not really that useful — more for a show than for cooking. So managing the fire can be a tough job. I would recommend you go for the gas burner if you really want to enjoy cooking with this oven.
You can cook pizzas in just 2 minutes, but with the small capacity of the oven, you can cook only one medium-sized pizza at a time.
The Ooni Karu 12 gives me a good option to choose between price, portability, and performance. If you are like me, who wants a versatile pizza oven without breaking the bank, then yes, it is worth the money.
Frequently Asked Questions (FAQS)
How long does it take to heat up the Ooni Karu 12?
The Ooni Karu 12 takes around 20 – 30 minutes to reach 850–900°F (455–480°C), depending on the fuel and conditions.
How do I light the Ooni Karu 12?
To light up the Ooni Karu 12, use dry kindling or fire starters with wood and charcoal, and let the oven warm up for 15–20 minutes.
What fuel does the Ooni Karu 12 use?
The Karu 12 is a multi-fuel pizza oven that lets you cook with wood, lump charcoal or Gas (gas burner sold separately).
What wood should I use in the Ooni Karu 12?
To cook with Karu 12, use dense hardwoods like oak, maple, or hickory for long-lasting heat and authentic wood-fired flavor.
Can I use pellets in the Ooni Karu 12?
No, the Karu 12 is only designed for charcoal, lump woods, and an optional gas burner. So wood pellets are not recommended.
What size pizza peel should I use for the Ooni Karu 12?
A 12–14-inch peel works best for Karu 12 for handling and sliding the pizza.
How many pizzas can I cook with the Ooni Karu 12?
The Ooni Karu 12 has a cooking space of about 13 inches so it is best to make just one pizza up to 12 inches.