Breeo Live-Fire Pizza Oven Review: A Backyard Pizza Oven That Truly Excels in Performance & Quality
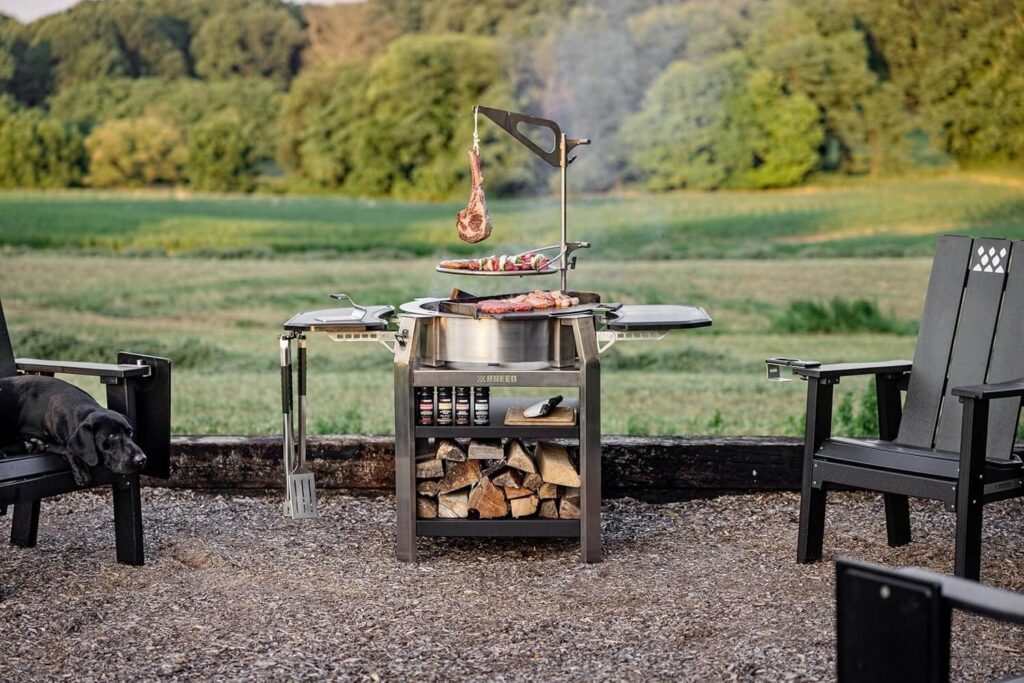
I have been using the Breeo live-fire pizza oven for a while now, and I am really impressed. It can make an authentic Neapolitan pizza with that wood-fired smoky flavor in a matter of minutes.
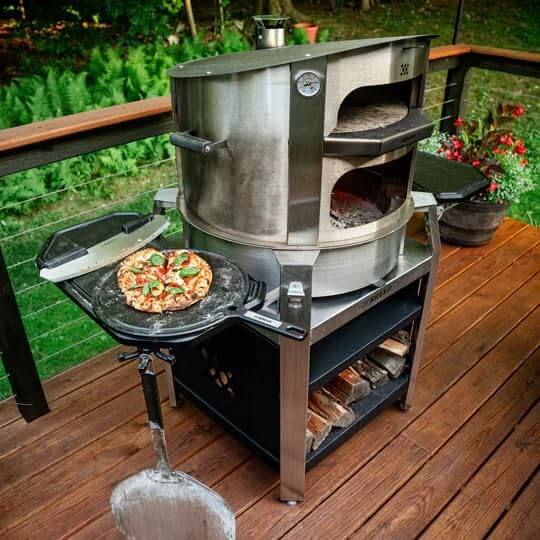
But the Breeo live fire is not a full oven like the Gozney Dome or Ooni Karu 2 Pro. It is an attachment that I had to place on top of the Breeo fire pit, like the Breeo X24 or X30. The X24 is a 24-inch fire pit, while the X30 is the larger version with 30 inches. If you want to use the larger one, then you will need an adapter. You can also use the Luxeve fire pit, as it works as well.
I have used this pizza oven for outdoor cooking and not just pizzas but also various meals, and this is one of the best wood-fired pizza ovens I have used so far.
Okay, let’s get straight into the review. In this article, I want to share my personal experience, including starting with the setup, the heating performance, and how it cooks different delicious pizza styles like New York and a smoky-flavored Neapolitan style.
Best for Backyard & Live Fire Cooking
Key Specifications
|
Material & Build |
Stainless steel or Corten steel, 1″ thick pizza stone |
|
Fuel Type |
Wood (compatible with Breeo fire pits X24, X30, Luxeve) |
|
Cooking Surface Size |
Fits pizzas up to ~12–13 inches |
|
Max Temperature |
Up to 1,000°F |
|
Weight |
76 lbs (oven) + 62 lbs (fire pit) |
|
Heating Speed |
400°F in 2 minutes |
|
Portability |
Liftable via side handles; sits on fire pit |
|
Insulation |
Thick stone retains heat; dome circulates heat evenly |
|
Cooking Capacity |
1 pizza at a time |
|
Pros
|
Cons
|
|---|---|
Unboxing & Setup
When I received the Breeo, the first thing I noticed was that both the fire pit and the live-fire oven attachment felt really heavy and had a solid build.
Yes, I am using the X30 model in Corten steel instead of the stainless steel version. Corten is a type of steel that slowly develops a rust-like layer on the outside, but that doesn’t mean it is actually rusting.
Well, there is not much difference between them. They are both very durable and built to last for years, but I chose this one just for the look.
When I received the package, I ensured that I had everything in order and that nothing was missing.
Setting up the Breeo live fire is simple. However, there are a few things to consider, as it is not like setting up an oven, such as a Gozney or Ooni. The Breeo oven is a separate unit, so you must place it directly on top of the fire pit.
And since I am using the X30 fire pit, I used the adapter ring to make it fit properly on top of the oven.
The oven comes with heavy and thicker pizza stones inside that act as the cooking surface. When I first unpacked it, I left out the cooking stones because the oven would feel very much heavier for me to move by myself.
Even though I removed the stones, it was still weighty for me to lift the pizza oven. This outdoor pizza oven is quite large and wide in size, and it even has handles, but they are not positioned in a way that allows for easy lifting. So, don’t try to assemble this oven by your own like I did. It was such a hassle. Take at least two people when you are assembling the Breeo oven.
Heating Performance
To start the fire, the first thing I did was to place a few dry logs with some kindling inside the oven. Then, I light the fire up by using firestarter cubes and papers to help the logs catch fire easily.
After that, I started adding bigger woods when the flames began to spread all over. Once the fire has been built and is burning well enough, I let the oven heat up for around 35 to 40 minutes, and after a while, the burnt wood turns into embers. These embers remain hot for a long time, helping to stabilize the oven temperature and making them suitable for live-fire cooking.
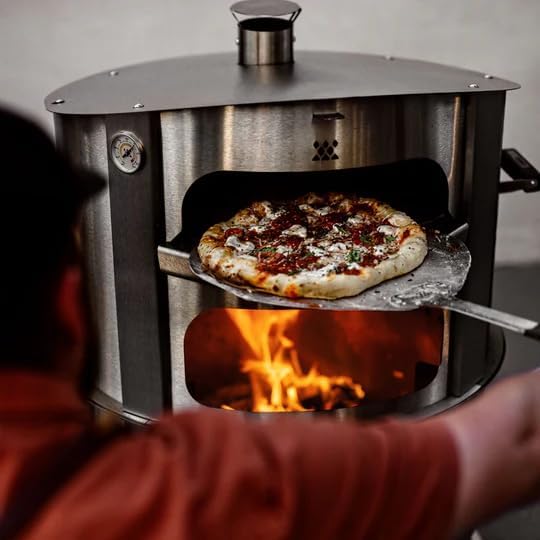
When I was preheating the oven, I needed to make sure that it got really hot before cooking. I kept a close watch on the temperature using the thermometer, and it read around 860°F.
The ideal temperature for cooking a nice pizza is between 800°F and 950°F, which allows for a Neapolitan-style pizza to be cooked in under 90 seconds. But there is one thing I noticed is that the back of the oven gets hotter than the front, so I had to rotate the pizzas in halfway with the Breeo pizza peel, but once you get the hang of it, you will get great results.
There is one crucial step you should remember: keep the adjustable chimney vent fully open at the very beginning when you are building the fire. And once the oven gets really hot, you can then partially close the chimney. By doing this, the heat remains inside the oven for a long time, causing the temperature to rise quickly.
Cooking performance
I tested the cooking performance of the Breeo Live Fire pizza oven by cooking not just Neapolitan pizzas, but also New York pizza and other foods, such as vegetables, meats, and steaks. Let me show you how this pizza oven performed.
Neapolitan Pizza Test
For making a Neapolitan pizza, I started by using the “00” flour, and this flour makes my dough easy to stretch, which gives a soft and chewy crust. Then I added about 65% hydration to the flour, along with a pinch of yeast and salt, and mixed everything so that the dough developed a nice texture and tasted good.
Now that the preparation of the dough has been done, I let it ferment so that I can get that tasty flavor. To get the best result, I left the dough in the fridge and fermented it for 24 hours.
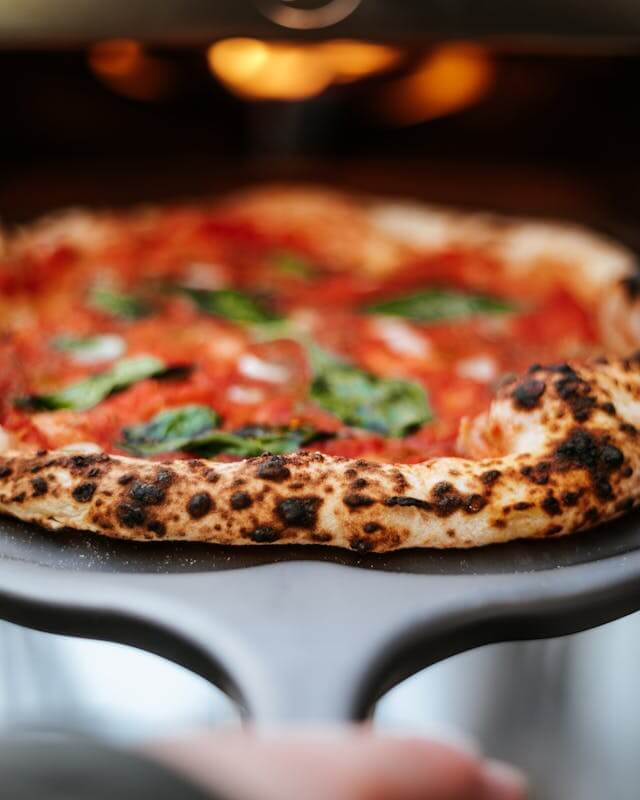
I decided to make a classic Margherita. After the fermentation, I added toppings such as crushed San Marzano tomatoes, small pieces of fresh mozzarella, a few basil leaves, and a bit of olive oil. I have a habit of keeping the toppings as light as possible so that the pizza cooks perfectly and the crust stays soft.
I already preheated the Breeo oven to 850°F-900°F earlier, and then I slid the pizza into the stone by using the peel. Then I rotated it perfectly so that it cooks evenly. At this temperature, it took me around 60–90 seconds to bake the pizza.
At last, when the pizza was ready, it came out with soft, chewy, charred edges, fresh toppings, and that smoky wood-fired flavor just like a true, authentic Neapolitan pizza.
New York Pizza Test

In the case of New York pizza, I tested by preheating the Breeo to about 600–700°F (315–370°C), and this lower range of temperature took me around 20–25 minutes.
Now the tricky part is that I had a hard time keeping the oven at this medium temperature. The pizza stone tends to get hotter, as it is designed to make Neapolitan pizzas, and keeping it at a lower temperature requires a bit of extra work.
I had to keep a close watch on the fire, adding smaller pieces of wood as well as adjusting the airflow so that it didn’t get too hot.
As for the toppings, I used tomato sauce and shredded low-moisture mozzarella, and I finished the dish with a light sprinkle of oregano for added flavor.
Finally, after getting the temperature right where I needed it, I slid the pizza in and baked it for 5-6 minutes. I turned the pizza with the pizza peel at around 3 minutes so the crust cooks perfectly.
Cheese Pizza Test
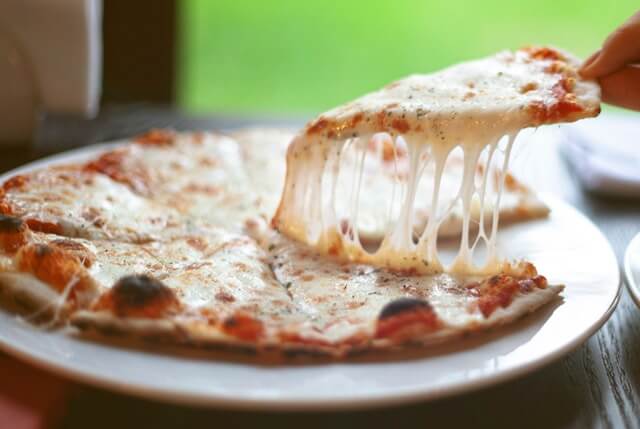
I tested the Breeo by making a cheese pizza too, and it came out beautifully. I started by preheating with small woods, and after 20-25 minutes, the pizza stone reached over 735°F.
Now, a range from 700–750°F is considered a sweet spot for cooking a wood-fired cheese pizza. I kept this in mind: it shouldn’t get too hot, above 800°F, as it will burn the crust in a matter of seconds and ruin my cooking.
For the toppings, I used tomato sauce and topped it with shredded mozzarella cheese. I even used a bit of olive oil on top of the cheese and sauce to get the cheese brown nicely, and also prevent the pizza from drying out too quickly. In a traditional Italian pizza like the Margherita, a drizzle of olive oil is quite common before baking.
After the topping is done and everything is ready, I dust the pizza peel with flour so that it doesn’t get sticky. Then I slid the pizza into the oven and let it bake for 2-3 minutes.
I kept a close watch on the bottom of the crust to see how it was browning without burning, and I turned the pizza about halfway through to ensure even cooking. Still, the Breeo cooks more evenly if you compare it to other backyard pizza ovens.
The outcome was just perfect. The cheese pizza came out very nicely with the airy crust puffed up and browned perfectly on the bottom—no sign of burning. Even the cheese melted out completely and was bubbling with a light golden color.
Other Foods I Cooked with the Breeo Live Fire Pizza Oven
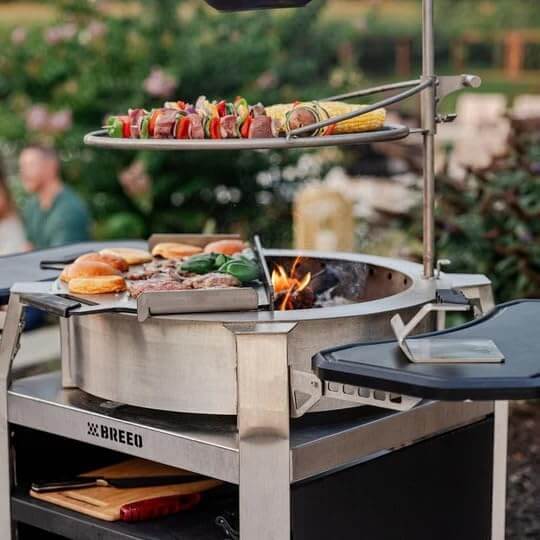
Not just pizzas, the Breeo Live Fire pizza oven is also capable of cooking other dishes like veggies and meats exceptionally well. I cooked these dishes, and the results were just excellent.
I started by cooking vegetables like grilled zucchini and bell peppers first. So I preheated the grate to around 400–450°F, which took me about 10–15 minutes to get the coals heated up steadily. For the woods, I prefer maple because the smoke is much lighter and slightly sweet, which blends very well with vegetables.
However, if you use woods like hickory or mesquite, they will give you a heavy and bitter smoke, which can ruin the natural taste of vegetables.
I already got my veggies ready for a live fire cooking. For the prep, I sliced the zucchini into long slices and cut the peppers into wide strips. Then I brushed these veggies with a bit of olive oil and a slight of pepper and salt. The olive oil prevents the veggies from sticking to the grill and also helps to brown better.
Then I placed the veggies directly on the grill at medium heat for 2-3 minutes, monitoring them closely until I saw the grill marks and smoky flavor. After that, I flipped them and cooked again for another 2–4 minutes until they were tender.
And voilà, the vegetables turned out juicy inside, with those grill marks on them and a hint of sweet smoke. The only problem I faced was that I had to watch the thin slices closely as they tend to cook too quickly.
So I made sure not to crowd the grill with a lot of vegetables because if the grate gets too crowded, they won’t cook properly, and I flipped them just one or two times. Just avoid turning them over and over again.
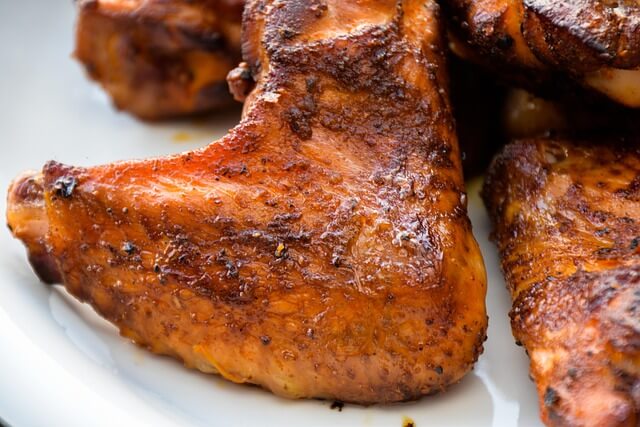
For the chicken thighs prep, I seasoned them with olive oil, garlic, paprika, salt, pepper, and a squeeze of lemon. Then I mixed them up and let them marinate for around 30 minutes.
I heated the Breeo for about 20 minutes. Then I cooked at 350–375°F on indirect heat to roast the chicken slowly for around 20-25 minutes. After that, I checked the internal temperature of the chicken thighs, and it was around 150–160°F. It was almost cooked.
After the meat is nearly cooked, I moved the chicken closer to the fire and added a few hickory chips. Then, when the temperature reached around 450–500°F, I cooked the chicken thighs for 3-5 minutes to make them crispy.
At the finishing stage of cooking, when the meat is almost cooked, I added a bit of apple wood so that I could get the sweet and smoky flavor.
After the inside of the meat reached 165°F, the cooking was done. I rest the meat for about 5 minutes, so that the chicken feels juicy and tender when I slice it into pieces.
How I Clean the Breeo Fire Pit and Live Fire Pizza Oven? (Step-by-Step Guide)
If you own a Breeo, that means you are dealing with two separate components: the fire pit and the live-fire pizza oven attachment. I have been using the Breeo for some time now, and for proper cooking, regular cleaning is very crucial for both of them. However, the steps for cleaning them are slightly different. Here is precisely how I did it.
How I Clean My Breeo Fire Pit?
So after cooking, I let the fire pit cool down completely and then start the cleaning process. First, I begin by removing all the burnt wood from the bottom of the Breeo using the ash shovel and placing it in a steel bucket. I also made sure there were no stuck ashes when I scooped out the ashes.
Then I used a clean cloth to clean the rim and the sides of the fire pit by removing the leftover soot, dust, and ashes.
Sometimes, I have to deal with ashes getting wet by the dew or rain. In that case, I sprinkle something dry over it like wood pellets or sand. This way, it soaks up all the moisture, making it easier for me to scoop off the ashes.
At last, after the Breeo Fire Pit has been cleaned up, I covered it with the Breeo fire pit cover to protect it from rain, snow, and debris.
Important Note: Never use plastic scoops to clean the fire pit, even if they are heat-resistant, as any hidden embers can melt them, which can become dangerous.
How I Clean the Breeo Live-Fire Oven?
I began by removing the charcoal and embers with the help of the Breeo ash shovel and disposing of them when they were cooled off.
As for cleaning the cooking stone of Breeo, I carefully removed the stones from the oven. Then I used a stainless steel scrubbing pad to remove the leftover food, such as the melted cheese and burnt toppings.
For the remaining ashes and debris, I used a soft, dry cloth to wipe them out.
After cleaning the Breeo Live Fire Pizza Oven, I placed the stones back in the oven and made sure they were correctly aligned.
Important Note: When you are cleaning the stones, never use water or soap because these things can crack or damage the stones.
Is the Breeo Live-Fire pizza oven worth it?
Yes, the Breeo Live Fire is a versatile pizza oven and definitely worth the investment, which gives the pizzas that smoky wood flavor and makes it stand out from others.
The best part of the Breeo is that it can reach nearly 1000 degrees, making it the ideal pizza oven for crafting authentic wood-fired Neapolitan pizzas and other dishes.
Breeo also comes with a base, which makes my cooking a lot easier and protects the outdoor surface. I didn’t need to purchase any extra tools, such as the peel, pizza rocker, and service board, separately. I got everything in the Breeo tools bundle when I bought the oven.
The price might be expensive when buying the oven and the fire pit separately. But the build quality of the Breeo is impressive, and you can’t get better than this.
Frequently Asked Questions (FAQS)
How hot does the Breeo Live-Fire Pizza Oven get?
The Breeo Live Fire Pizza Oven is capable of reaching over 950°F, which is hot enough to cook Neapolitan-style pizza in just a couple of minutes.
How long does it take to preheat the Breeo Pizza Oven?
The Breeo takes around 20–30 minutes to reach proper pizza-making temperatures.
Is the Breeo Pizza Oven suitable for backyard cooking?
Yes, the Breeo is designed for outdoor use and works well for a backyard pizza party or any group gatherings.
How long do Breeo fire pits last?
Breeo fire pits are built from 304 stainless Corten steel and can last decades if you take proper care of them. Many Breeo owners consider them a lifetime investment, and a limited lifetime warranty with a 5 year rust-through guarantee.
Do Breeo fire pits rust?
Stainless steel Breeo fire pits are highly rust-resistant. But if you own a Corten steel, it will develop a patina on the surface, which actually protects the metal and prevents deeper corrosion.
Are Breeo fire pits smokeless?
Yes, Breeo pits have a double-wall airflow system to burn off smoke before it escapes, which makes them almost smokeless when you use dry wood.