12 Common Pizza Making Mistakes Most Home Bakers Don’t Understand (Heat & Surface Guide)
Pizza is one of the world’s most delicious foods you can make at home. Everyone loves a good homemade pizza with that crispy crust, melted cheese, and toppings that truly feel like heaven. But not only beginners; even many home bakers struggle to understand why their pizzas didn’t come out the way they expected.
I faced the same problems when I first started making homemade pizzas. I always thought something was wrong with my pizza dough or toppings, even though I did everything right. But I never realized that many common pizza-making issues start with proper heat, a properly setup pizza oven, and the baking surface we use.
And once I understood these small details, my pizza baking was never much easier than before. Now let’s look at some of the common pizza-making mistakes that most bakers don’t even realize and how to avoid them.
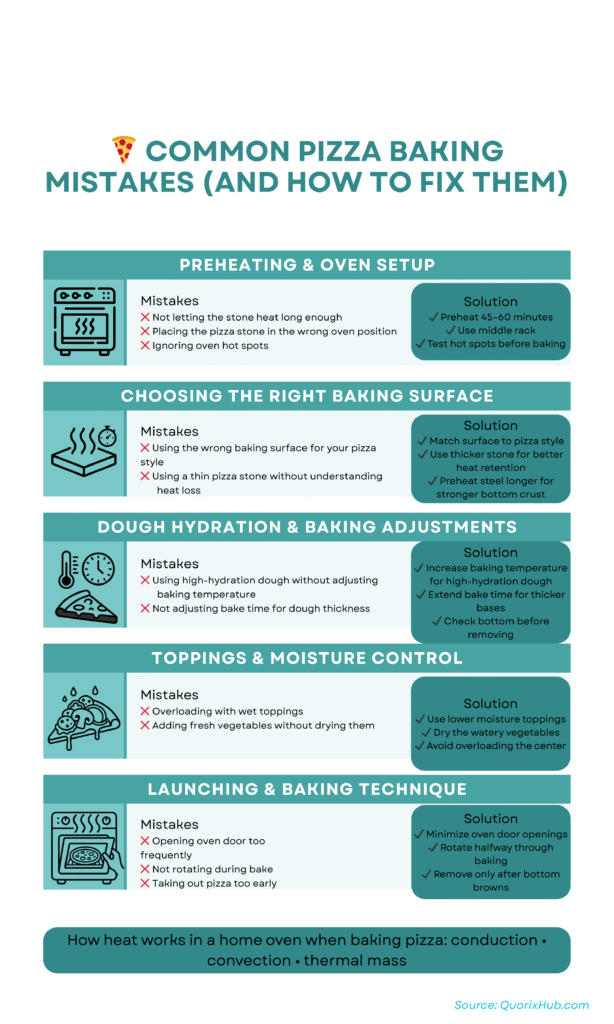
But before we get into these mistakes, I have created a quick visual overview below so you can understand them more easily.
Mistake #1: Not Preheating the Oven Long Enough
The first common pizza-making mistake I made a lot when I first started baking my homemade pizzas, was thinking my oven was ready as soon as it reached the desired temperature. When I used my regular kitchen oven, I preheated it for only 15-20 minutes because I thought it was hot enough to bake.
However, after a few bakes, I noticed that the cheese melted just fine and the toppings looked good too, but the bottom of my pizzas was soft and pale. Then, after several attempts and failures, I realized that even though the temperature looked fine, my pizza stone wasn’t fully heated on the inside.
The oven surface was warm, and the stone didn’t have enough time to retain heat, so my pizza crust wasn’t cooking properly. Even outdoor ovens and regular ovens don’t behave the same way, but if you are using an outdoor pizza oven, it can heat up faster; the baking surface still needs time to absorb heat evenly.
And since then, I always extended the preheating time of my oven before cooking my pizzas. From my experience, I learned that the baking surface must be completely heated so that the bottom of the pizzas can turn crispy.
Mistake #2: Using Too Much Flour or Semolina Under the Pizza Dough
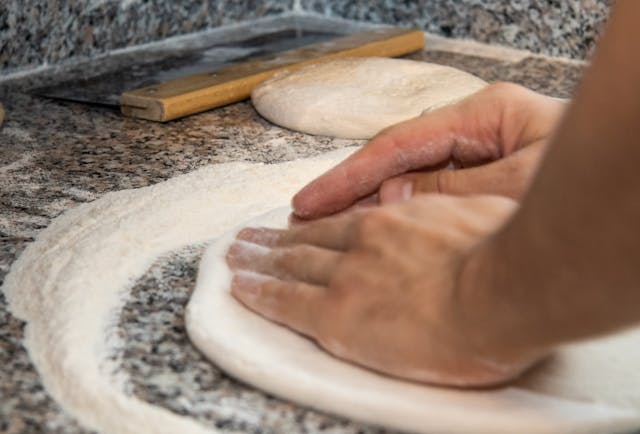
Another common mistake I made was using too much flour or semolina under my pizza dough. When I was learning to bake pizzas for the first few times with my regular kitchen oven, I was really scared that my dough would stick to the pizza peel when launching the pizza into the oven, so I used to use too much flour on the peel to play it safe, as I thought if I used more flour, it would stick less.
However, when I slid my pizza onto the hot stone, it got worse. All the excess flour fell directly onto the surface, and after some time, I could literally smell that something was slowly burning. And after baking, the bottom of my pizzas got dark, burnt patches with an awful bitter taste. There was no crispy crust like I wanted; the bases of the pizzas were dry and dusty, and later, when I tried to cut the pizzas, burnt flour stuck to the bottom.
When I started learning to bake pizzas, I used my regular kitchen oven, which could reach about 250°C (480°F). Later, I thought that if I had used my outdoor pizza ovens like the Gozney Dome or the Ooni Karu 2 Pro, the situation would have gotten worse.
You see, these outdoor pizza ovens run at very high temperatures, like around 400–450°C (750–850°F), so if I had used too much flour, it would have burned almost instantly, and it would have been really serious. After realizing the issue, I started dusting the peel lightly so the dough wouldn’t stick.
One important thing to remember is not to let the dough sit on the peel for too long, as pizza dough is soft and tends to absorb moisture quickly. Even waiting for 5 minutes might be risky. So, put the pizza in the oven as soon as the toppings are ready.
Mistake #3: Using Too Much Sauce or Overloading Toppings
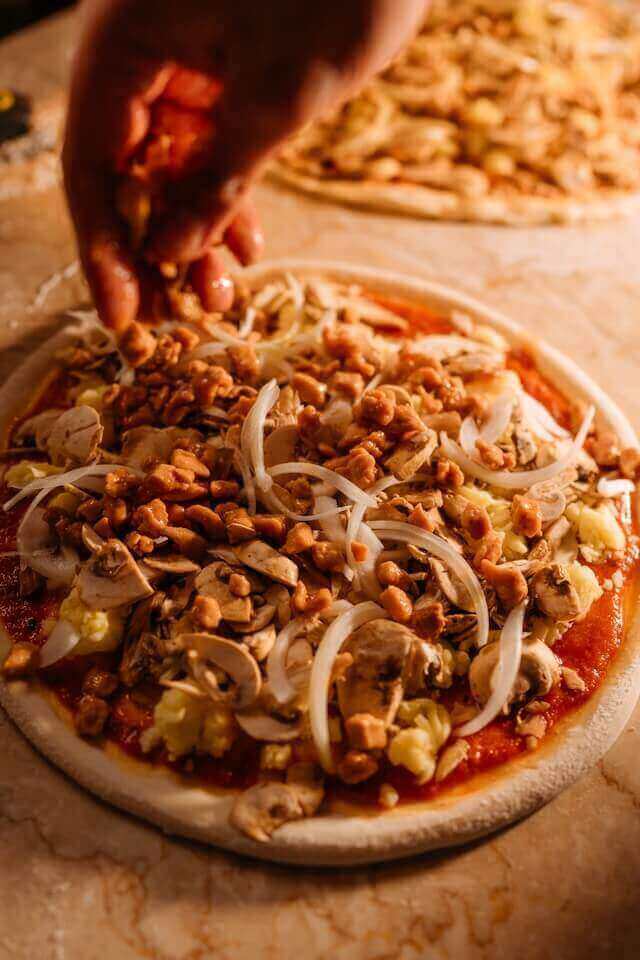
Overloading your pizza dough with toppings or too much pizza sauce might turn your pizza into a disaster. Most home cooks think adding more ingredients, like adding more extra sauce, pepperoni, mushrooms, and bell peppers, will make pizza better. But in reality, it can do the opposite.
When you add too many toppings to the pizza dough, they release moisture when baking and trap the steam. As a result, the center of the pizzas doesn’t cook properly, and the crust becomes soft rather than crispy.
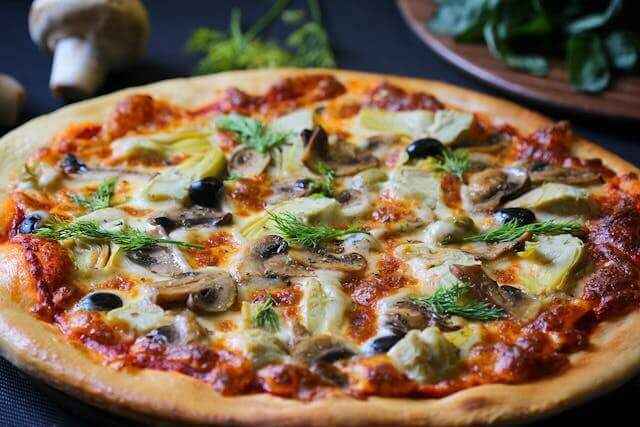
So if you are planning to bake a thin Neapolitan-style pizza, keep it as simple as possible, with a maximum of 2 to 3 toppings. A safe side would be tomato sauce, fresh mozzarella, and a few basil leaves. If you want, you can add an extra topping like pepperoni or mushrooms. That’s it, nothing more.
If you think about it carefully, the issue is not just about the quantity of toppings; the problem lies in the ingredients you are using, which cause too much moisture. You see, toppings like pepperoni, cooked sausages, olives, and thin onion slices are much safer to use because they are dry. On the other hand, ingredients like fresh tomatoes and bell peppers contain too much water, and if you add too much of them, they will release moisture, and your pizzas will get soggy, and you won’t get that crispy chewy crust.
However, that doesn’t mean you can’t use them at all. If you cut the bell peppers and tomatoes into thin slices and distribute a moderate amount evenly, then it won’t cause any problems.
Mistake #4: Baking on a Sheet Instead of a Heated Surface
Not everyone owns a pizza stone or steel, and it is not necessary either if you are baking pizza sometimes, once in a while. A baking sheet is good enough for occasional pizza cooking. A baking sheet works really well for thick pan pizza, Detroit-style pizza, or focaccia-style pizza, yielding a soft bottom and a bread-like texture.
A baking sheet is also good for beginners because it reduces the risk of burning, and you can even bake directly on the tray. No hassle at all.
But if you are planning to make a Neapolitan-style pizza with a crispy, even bottom-browning crust, a baking sheet won’t work. When you bake in a sheet, it won’t hold much stored heat. A sheet is usually thin metal and cools quickly because it has low thermal mass.
Let me explain. The moment you place the dough on it, the sheet will cool quickly because the dough is much colder than the metal, which cools the surface faster. And due to this drop in temperature, heat transfer weakens, slowing your cooking and ultimately affecting crust browning.
And in the end, the crust is more likely to turn pale or slightly soft rather than crisp. But when using a pizza stone or steel, it can retain more heat during preheating, and the faster heat transfer helps the crust firm up earlier and achieve better browning with a crispy texture.
Mistake #5: Opening the Oven Door Too Often
When you are baking a pizza halfway through, most of us get too excited and keep peeking through the oven door. But do you realize that every time you open the oven door, you lose a lot of hot air, and the oven temperature drops quickly?
In a standard home oven, the heat doesn’t recover quickly as you think. When you open the door, it drops by around 25–30°F in seconds, letting cold air in and slowing your bake.
Moreover, even the pizza stone or steel you are using starts to lose surface heat, which affects bottom browning. Not only that, but the cheese also melts unevenly, and the crust gets less crispy with frequent door openings.
Many people open the door often because they worry the pizza will burn if they don’t rotate it every 30-35 seconds. In a home oven, the baking time is usually around 10 minutes, depending on the pizza style. But these are home ovens, not a typical wood-fired oven, where you need frequent rotation, where the baking time is much quicker, like within 90 seconds.
But in a normal home oven, opening the door repeatedly can affect your pizza’s baking, and the result will not be what you expect.
You see, a delicious pizza needs a steady, stable heat to cook properly and evenly. So keep the door closed for 3-4 minutes and rotate it when needed (usually halfway). And always preheat properly, like let the stone get fully heated for at least 30 – 45 minutes, so you don’t have to check again and again. You can even set a timer or look through the glass instead of repeatedly opening the door.
So, as I said earlier, pizza baking needs stable, continuous heat; the less you open the door, the better the result you will get.
Mistake #6: Trying to Bake Multiple Pizzas Back-to-Back Too Quickly
Have you ever wondered why, when you try to bake back-to-back pizzas in your home oven, the first one comes out great, but the second one doesn’t? It happens because a pizza stone stores the heat during preheating, so when you place the dough on it, the stone transfers that stored heat directly into the bottom of the pizza. This direct heat transfer is called conduction.
You must have realized that in the first bake, when you place the dough onto the hot stone, the cold dough instantly pulls a lot of heat from the baking surface. And after baking, when you remove the pizza, the oven air temperature is around 250–260°C (480–500°F), but did you know the actual stone temperature has dropped?
So now, if you try to bake another pizza right away, the base won’t bake properly, leading to a softer crust and slower bottom browning. It is because at the time of launching the first pizza, it already drained the heat during the first bake, so it needs more time recharge to get that heat back.
You must have noticed that the oven temperature display is good enough for another bake, but that can be misleading because what matters most is the surface temperature, heat retention, and proper heat recovery. So, without giving the stone enough time to regain heat, the second pizza won’t bake the same way as the first one.
I have found effective ways to bake multiple pizzas at a time. Here are some easy solutions you might find helpful.
The first solution is to use a pizza steel instead of a thin cordierite stone, as steel conducts heat much faster and recovers the surface temperature more quickly between bakes.
Another solution is to use two stones or to use both, a stone and a steel. Just place the stone on the middle rack and the other on the lower rack. When you use one, the other keeps heating, so you can easily switch between the two and keep baking. If you are a regular home baker, I recommend using both steel and stone for better performance.
The last thing you can do is turn on your convection setting to help the oven’s air circulate, which speeds up heat recovery time. It helps the oven stabilize faster, which supports better heat retention in the stone or steel, and I found it very helpful when baking pizzas back-to-back.
Mistake #7: Baking Pizza at a Low Oven Temperature
Another common mistake most home bakers make is thinking they can bake a better pizza at a low home oven temperature of around 200–220°C (400–425°F). So if you think the oven is hot enough and perfect for baking a pizza, think again.
Well, of course, in this kind of temperature it is ideal for baking regular foods like Focaccia, Roasted vegetables, Sandwich bread, etc., but not a traditional pizza. It needs intense heat, so you have to give the home oven at this highest safe temperature.
When the temperature in a home oven is too low, the dough doesn’t rise properly, so the crust stays dense rather than becoming soft and airy. The bottom doesn’t get that crispy feel, and the cheese melts very slowly, which can lead to a long baking time and cause the toppings to release extra moisture.
Traditional pizzas, such as authentic Neapolitan-style and thin-crust pizzas, don’t bake properly because they’re cooked at very high temperatures for short baking times.
However, if you really want to bake a Neapolitan-style pizza using a home oven, you can still get close, but not a traditional one like you can bake in an outdoor pizza oven. A Neapolitan pizza is usually baked in a wood-fired pizza oven at around 430–480°C (800–900°F) and bakes within 90 seconds.
On the other hand, most home ovens generally have a maximum temperature of 250–290°C (475–550°F). Now that’s quite a big difference, isn’t it? So, even at the highest settings in a home oven, the bake time gets longer, usually around 5-7 minutes, it will be difficult to get those perfect pizza leopard spots, and the crust won’t be able to puff up as much as in a high-heat oven.
But at a lower oven temperature, you can still bake a thick-crust pan pizza or a deep-dish pizza, because these pizzas don’t need extreme heat like Neapolitan pizza. They are meant for longer bakes. These pizza styles usually have thicker dough and heavier toppings, so they naturally need more time in the oven.
These pizzas can take around 20-40 minutes, and baking at 200–220°C can work for these thicker pizza styles. However, at low temperatures, these pizza styles can work; at high heat, they still give better results.
Mistake #8: Using a Thin Pizza Stone Without Understanding Heat Loss
Cooking a pizza on a stone can yield a perfect, crispy crust, but most people don’t realize that using a thin stone in your home oven can seriously affect heat retention.
Thin stones are usually around 8–12 mm thick (about ⅜–½ inch), and they do heat up fast, like within 30–45 minutes for proper preheating, but they don’t have the capacity to hold the heat for too long.
When the dough touches the surface, the temperature tends to drop very quickly as it absorbs heat from the stone, which can prevent the bottom from browning properly and becoming crispy.
If you are using a thin pizza stone, you may have noticed that the first pizza came out nicely, but the second didn’t cook as well. It happens because the stone didn’t fully recover the heat it had lost.
The problem isn’t about the stone material like cordierite, ceramic, or clay stones you are using; it’s about the lower thermal mass and heat retention of the stone.
So, using a thicker pizza stone is best for stable baking, and look for at least a 15–20 mm thick Cordierite stone. Though thicker stones take longer to preheat, they retain heat better and are perfect for baking multiple pizzas at once.
But if you already have a thin stone, they can still work great for single pizzas, but they might struggle if you’re thinking of baking back-to-back pizzas. So I recommend waiting a few minutes for the next bake and avoiding heavy toppings.
Mistake #9: Not Letting the Stone Heat Enough
When you preheat your oven, the temperature might show 250°C (482°F), and you think the oven is ready to bake a pizza.
But most home cooks fail to understand that even if your oven is preheated, it doesn’t mean your pizza stone is ready. In fact, there are two types of heat in the pizza stone: the outer and the inner part.
The outer part of the stone might be hot enough, but did you realize the inside isn’t hot enough for a bake? Think of it as if you are cooking a thick piece of meat. The outer part looks cooked, but the inside didn’t get enough time to cook. This same concept applies to a pizza stone.
This is where people make the common pizza mistake that leads to slower or uneven baking. So if you try to bake the pizza on the stone too early, the dough quickly pulls heat from the surface, and when the stone’s interior isn’t hot enough, the temperature drops quickly.
As a result, the bottom of the pizza will look pale and won’t be as crisp as you expected. It usually happens because dense materials like baking stones heat up very slowly and need more time for preheating.
So avoiding this issue is really simple. Just preheat for at least 45 minutes, and don’t depend on the oven temperature display. You have to make sure that the inside of the stone gets fully heated before baking. If you still want more accuracy, you can use an infrared thermometer to check the surface temperature before baking. While it doesn’t actually measure the stone’s interior, it will be a good indication that you can start baking.
Mistake #10: Using the Wrong Baking Surface for Your Pizza Style
In the early days, I used to bake pizzas in my home oven, and while I did try many types of pizzas, most of them failed because I didn’t realize that not all baking surfaces work the same way.
If you are using a pizza stone, steel, a cast-iron pan, or even a regular baking sheet, they all heat up differently. Some of these baking surfaces are very good for extreme bottom heat, while others are known for slow, even baking.
While you may not have all of these, if you use the wrong one for your pizza style, then you are literally messing up your pizza.
For instance, if you are planning to bake a thin pizza, like a Neapolitan- or New York-style pizza with light toppings, you will need something that heats up quickly and transfers heat to the dough quickly. So steel is great for this kind of pizza and also helps you get that strong bottom browning.
But if you use steel for baking a thick-crust pizza, a pan pizza, a Detroit-style pizza, or something with heavy toppings, the bottom will cook very quickly, while the toppings will remain undercooked. In this case, a cast-iron pan works better, as it holds heat well and is good for longer baking times.
A regular baking sheet is usually thin, heats up quickly, and is very easy to use, but it has some limits. Well, of course, you can bake pizzas, but because it doesn’t retain heat well, the bottom won’t brown evenly, and the crust will be softer and not as crisp as you want.
A pizza stone is the best overall option, as it heats up slowly and gradually, giving you a balanced, even bake. These work for thin pizzas too, but they are not as aggressive as steel. Pizza stones are great for traditional hand-stretched pizzas and medium-thick crust pizzas.
A proper baking surface does matter a lot when you are baking different pizza styles. The mistake is not always about the dough or the toppings. Once you understand how each baking surface behaves in your home oven, you can choose the right one for more consistent, better results every time you bake.
Mistake #11: Placing Your Pizza Stone in the Wrong Oven Position
Now that you have realized the importance of the right surface, you also need to understand where the stone should be placed in the oven. The rack position can make all the difference when you are baking pizzas, and if done right, the outcome will be just as you expect.
Most home ovens we use produce stronger heat from the bottom heating element. So if you place the stone too low in the oven, the bottom crust may brown too quickly, but the toppings and the cheese may need a bit more time to cook evenly.
On the other hand, if you place the stone too high, it will be the opposite. The top layer will cook very well, especially if it’s close to the top heating element, but the bottom will cook more slowly than on the lower rack.
The best bet is to place the stone in the middle rack position, as it is the safest and most balanced for baking. But not all home ovens behave the same way. If the middle rack still doesn’t give you a perfect bake, like the bottom rack is still cooking too quickly, try placing the stone one rack higher (upper-middle). And the same goes for the lower-middle rack, if the toppings melt too quickly.
If you’re using a pizza steel, you may need to place it on the upper-middle rack, as steel transfers heat more aggressively than stone, so it is recommended to raise it a bit to help prevent the bottom from cooking too fast.
And lastly, I recommend you avoid placing your pizza stone directly on the oven floor, as it is not designed to support heavy weight, can block airflow, and even increase the risk of thermal shock, which can damage the stone.
Mistake #12: Why ignoring hot spots affects pizza baking
Have you ever noticed that you set up your home oven perfectly, yet your pizzas still bake unevenly? The temperature is displaying accurately, like around 500°F, but did you realize that the desired temperature isn’t the same across every corner of your oven?
It happens because some parts of your oven are hotter while other areas remain cool. In most home ovens, the heating element is located at the bottom or, sometimes, at the back. These uneven heats are called hot spots.
So naturally, the area near the heating element gets hotter, and so one side of your oven tends to cook pizzas faster than the other. When you bake a pizza, you must have noticed that the bottom crust browns faster and the cheese melts more quickly. But when you take it out, the other side is darker and paler. Sometimes, one side of your pizza may start to burn while the other side still needs more time to cook. If you notice these things, it is a clear sign of hot spots.
Using a high-quality pizza stone will fix this problem, but the issue is not about the stone; it is about the air and the heat flow in your oven, which is still uneven. A pizza stone only helps by evenly distributing heat, which can improve the bottom crust, but it cannot fix the uneven hot spots in your home oven.
The solution is to rotate the pizza during baking. When you rotate your pizza halfway, the part of the pizza that was closer to the heating element moves away from that heat, and the part of the pizza that was in the cooler area now gets the heat it needs. So in this way, the pizza will bake evenly from all sides.
In most home ovens, the usual baking time is 6 to 8 minutes, and a single rotation in the middle is usually enough, so turning over and over again is not necessary in most cases.
If you are not sure whether your oven has hot spots, you can place some bread slices on the desired rack and set the oven to around 400°F for a few minutes to see which part browns faster.